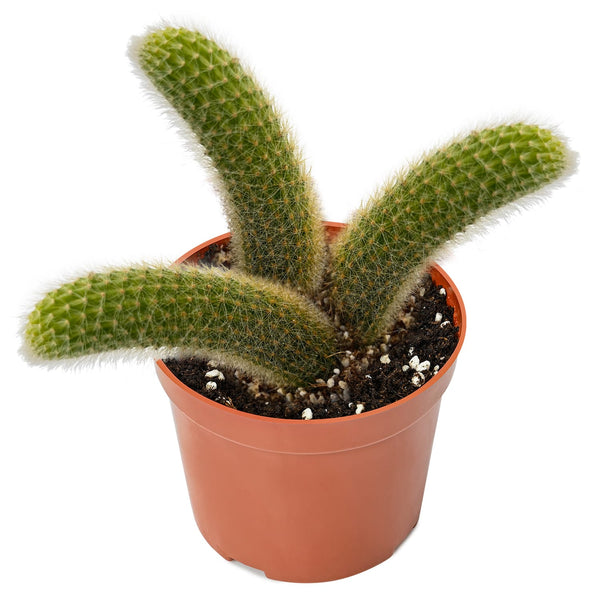
Cactus propagation is often touted as one of the most rewarding aspects of desert gardening. There is something almost magical about taking a single segment of a Prickly Pear or a tiny "pup" from a Golden Barrel and watching it establish its own root system. However, while cacti are legendary for their ability to survive neglect in the wild, the propagation process is a delicate surgical procedure.

In the years of professional succulent cultivation, I have seen more cuttings lost to "kindness" than to neglect. Most enthusiasts approach cacti with the same mindset they use for tropical houseplants, which is the quickest route to a mushy, black mess.
To help you successfully expand your collection, let’s dissect the most common cactus propagation mistakes and, more importantly, how to fix them.
1. The "Rush to Plant": Skipping the Callus Phase

The single most frequent mistake in cactus propagation is planting a fresh cutting directly into soil.
Why It’s a Problem
When you take a cutting or remove an offshoot, you are creating an open wound. In the world of cacti, this wound is a gateway for pathogens, fungi, and bacteria. If you place that raw "wet" end into moist soil, the plant has no defense mechanism. It will absorb water too quickly through the wound, causing the cell walls to burst and rot to set in within 48 hours.
The Professional Fix

You must allow the cutting to callous. This is a process technically known as suberization, where the plant forms a protective layer of cork-like tissue over the wound.
The Method: Place the cutting in a dry, shaded area with plenty of airflow.
2. The "Love to Death" Syndrome: Overwatering New Cuttings

New gardeners often assume that because a plant is trying to grow roots, it needs a constant supply of water. This is the exact opposite of the truth.
Why It’s a Problem
A cactus cutting with no roots has no way to "drink." If the soil is wet, the moisture simply sits against the base of the plant. Without roots to uptake that water, the soil remains anaerobic (lacking oxygen), which is the perfect breeding ground for Pythium and other root-rot fungi.
The Professional Fix
Adopt a "Dry Start" philosophy. Place your calloused cutting on top of completely dry cactus mix. Do not water it for at least two weeks.
Note: The plant will survive on its stored water reserves. In fact, a slight thirst actually triggers the plant’s survival instincts, prompting it to push out "searcher roots" in search of moisture. Only once you feel resistance when gently tugging the plant should you begin light watering.
3. Soil Sins: Using Standard Potting Mix
Many "all-purpose" potting soils claim to be suitable for succulents, but they are often too heavy in peat moss and organic matter.
Why It’s a Problem
Peat moss is designed to hold moisture—the literal enemy of a propagating cactus. Standard soil compacts over time, squeezing the air out of the root zone. When a new, fragile root tries to push through dense, wet peat, it often suffocates and dies before it can even establish itself.
The Professional Fix
Create a "Gritty Mix." For propagation, your substrate should be at least 60-70% inorganic material.

Pumice or Perlite: Provides essential aeration.
Coarse Sand: Adds weight and drainage (avoid fine play sand, which clogs pores).
Lava Rock or Calcined Clay: Helps maintain structure.
Minimal Organic Matter: A small amount of coconut coir or well-aged compost is all you need for nutrients once roots appear.
4. Light Mismanagement: Scorching the "Newborns"
While mature cacti thrive in 8+ hours of direct desert sun, a cutting is in a state of extreme stress.
Why It’s a Problem
An unrooted cutting cannot regulate its internal temperature through transpiration (the plant equivalent of sweating). If you place a fresh cutting in direct, blistering sun, it will likely sunburn—turning a sickly yellow or white—or simply desiccate (dry out) before it can grow roots.
The Professional Fix
Provide Bright, Indirect Light.

Indoor: A foot away from a south-facing window with a sheer curtain.
Outdoor: Under a 50% shade cloth or in the dappled light of a larger tree. Once the plant is rooted and showing new green growth at the tip, you can slowly acclimate it to more intense light over a period of several weeks.
5. Polarity Problems: Planting the Cutting Upside Down
This sounds like a silly mistake, but with columnar cacti or segments of certain species, it is surprisingly easy to lose track of which end is which.
Why It’s a Problem
Cacti have a distinct biological polarity. The vascular system is designed to transport nutrients up and auxins (growth hormones) down. If you plant a cutting upside down, it will almost never grow roots from the "top" end, and even if it does, the plant will struggle to grow properly.
The Professional Fix

Mark the Bottom: As soon as you make a cut, use a felt-tip marker or a small piece of painter's tape to mark the "up" side.
Observe the Spines: On many species, the areoles (spine cushions) have a slight upward or downward tilt. Study the parent plant before cutting to memorize the pattern.
6. The "Check-and-See" Habit: Disturbing the Roots
We all get impatient. It is incredibly tempting to pull the cutting out of the soil every few days to see if any white nubs have appeared.
Why It’s a Problem
New cactus roots are hair-thin and extremely fragile. When you pull a plant out of its grit, you inevitably snap those microscopic root hairs. Each time you do this, the plant has to restart the rooting process from scratch, depleting its precious energy reserves.
The Professional Fix

Trust the process. Instead of pulling the plant out:
Look for new growth at the apex (the top). If the top is growing, the bottom has roots.
The "Wiggle Test": Very gently nudge the plant with one finger. If there is resistance and the plant doesn't flop over, the roots are grabbing the soil. Leave it alone!
7. Ignoring Sanitation: The Dirty Blade Disaster
Using your kitchen scissors or a rusty garden spade to take a cutting is a recipe for infection.
Why It’s a Problem
Bacteria and fungal spores are everywhere. A dirty blade introduces these directly into the plant’s "bloodstream." If your last project was pruning a rose bush with a fungal infection, you are essentially injecting that fungus into your cactus.
The Professional Fix
Sterilize your tools before every cut.

The Method: Wipe the blade with 70% Isopropyl alcohol or dip it in a 10% bleach solution.
The Tool: Use a very sharp, non-serrated knife for a clean, smooth surface. A clean cut heals much faster than a jagged, crushed one produced by dull bypass pruners.
8. Seasonal Timing: Fighting Against Dormancy
Many hobbyists try to propagate their plants in the middle of winter because they have more time for indoor gardening then.
Why It’s a Problem
Most cacti are "opportunistic growers" but have a deep-seated winter dormancy triggered by shorter day lengths and cooler temperatures. Attempting to propagate in December means you are fighting the plant's natural hormones. The cutting will likely sit dormant for months, increasing the risk of it drying out or rotting before spring arrives.
The Professional Fix
Propagate during the Active Growing Season.
Late Spring to Early Summer is the "Goldilocks Zone." The temperatures are warm (but not excessively hot), and the days are long, providing the plant with maximum energy to fuel root development.

9. Temperature Extremes: The Cold Floor Mistake
Temperature plays a massive role in how fast cells divide and roots form.
Why It’s a Problem
If you are propagating indoors, placing your pots on a cold windowsill or a tiled floor can chill the soil. Cold soil inhibits root growth. Conversely, excessive heat (over35℃ or 95℉) can cause the cutting to go into a heat-induced dormancy to protect itself.
The Professional Fix

Keep the "feet" warm.
Roots form fastest when the substrate is between 21℃ and 27℃ (70℉-80℉).
If you are propagating in a cool house, consider using a seedling heat mat set to a low temperature to provide consistent bottom heat.
10. Deep Burial: Planting Too Deep
When a cutting is top-heavy, the instinct is to bury it deep in the soil so it stays upright.
Why It’s a Problem
The deeper the plant is buried, the less oxygen reaches the base, and the more surface area is exposed to potential soil-borne pathogens. Deep burial significantly increases the chance of "stem rot," where the base of the plant turns into a hollow, brown shell.
The Professional Fix

Plant shallowly—usually only 1 to 2 inches deep.
How to stabilize? Use a top dressing of heavy gravel or decorative river rocks to hold the cutting in place. Alternatively, use a bamboo skewer or small stakes to prop the plant up until its roots are strong enough to support its weight.
Conclusion
Cactus propagation isn't about "making" the plant grow; it’s about providing the perfect environment so the plant can do what it’s genetically programmed to do. By respecting the callous phase, using sterile tools, and resisting the urge to overwater, you remove the obstacles that lead to the most common failures.

Success in the cactus garden is measured in months and years, not days. Be patient, observe your plants closely, and don't be discouraged by a few losses along the way—even the pros lose a cutting now and then!