

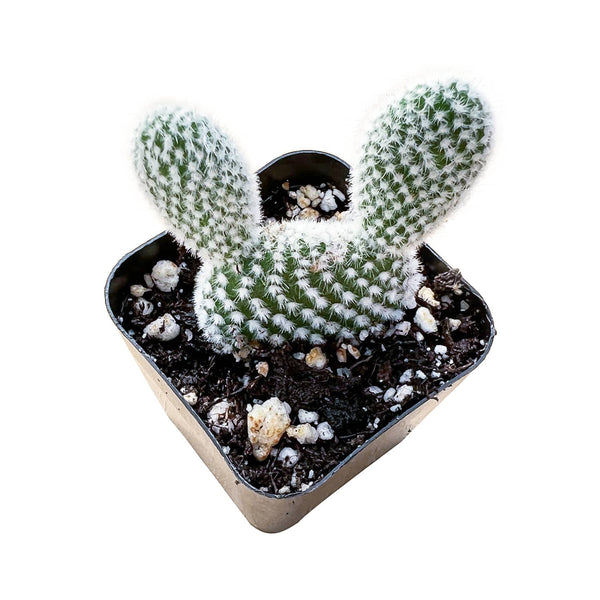
Kalanchoe tomentosa succulents, often known as the panda plant or panda succulents, are characterized by their fine, natural hair covering. At the same time, some varieties feature stunning leaf edges, adding to their aesthetic appeal. These distinctive traits grant them high ornamental value.
Panda plants are highly adaptable and have excellent reproductive ability, which makes them easy to grow in clusters and form tree-like stems. In contrast to other soft succulents, they can thrive outdoors in hot summers and have a high survival rate during reproduction in the summer months.
If you ask me to recommend super low-maintenance succulents, panda plants should be on the list!

There are three methods to propagate panda plants
01. Leaf propagation
03. Leaf cut propagation

In this blog post, I will mainly share the latter two methods. One of these methods has a higher success rate, while the other is considered the most unconventional and incredible method.
What to Prepare Before Propagating Panda Plants?
Valuable tools should be arranged before starting the propagation process.
Cleaning and sterilizing the garden tools is recommended.
1) One mature and healthy panda plant
2) A pair of scissors or a sharp blade
3) Planter pots with drainage holes (H≥2")
5) A long-neck water bottle
6) A spray bottle
Method 01: Propagate Panda Plant from leaves
Step-by-step guide:
Step 1: Choose a Healthy Leaf:
Select several mature, healthy leaves from a vigorous plant. The leaf should be thick and plump, free of spots or damage, firm, and not wrinkled.
Step 2: Let the Leaf Callus:
Place the leaves in a dry, shaded location with good airflow. Allow the cut end to dry for 2-5 days and form a protective callus before planting.
Step 3: Prepare Well-Draining Soil:
Use a gritty succulent mix that contains 50–70% pumice, perlite, or coarse sand and 30–50% cactus or succulent potting mix. Then fill a shallow nursery tray or small pot with the soil.
Step 4: Place the Leaf on the Soil:
Lay each callused leaf flat on top of the soil. Do not bury the leaf. The cut end should lightly touch the soil surface so new roots can easily grow downward.

Step 5: Provide Bright, Indirect Light:
Keep the propagation tray somewhere bright but out of harsh afternoon sun.
Step 6: Water Sparingly:
Unlike mature succulents, newly propagating leaves benefit from slightly more moisture—but never soggy soil.
Step 7: Wait for Roots and Baby Plants.
Typically, it will take 2-4 weeks to see the new roots and baby plant form at the base. Some leaves may simply dry up without producing offsets, which is completely normal.
Step 8: Transplant the Baby Plant:
Carefully move it into a small pot filled with succulent soil. Continue watering using the soak-and-dry method, allowing the soil to dry completely between waterings.

Method 02: Use stem-cutting to propagate panda plants (high success rate)
Step-by-step guide:
Step 1: Take a Healthy Stem Cutting:
Choose a healthy, mature stem from the mother plant. Cut a stem that is 3–5 inches (8–13 cm) long and has at least two to four healthy leaves.
Step 2: Let the Cutting Callus:
Place the stem cutting in a warm, dry location with good air circulation and bright, indirect light. Allow the cut end to dry and form a protective callus for 2–3 days before planting.
Step 3: Plant the Cutting:
Fill a small pot with a fast-draining succulent mix. A good soil blend contains 2/3 cactus or succulent soil, 1/3 pumice, perlite, or coarse sand. Insert the callused stem about 1–2 inches (2.5–5 cm) into the soil. Gently firm the soil around the base so the cutting remains upright.

Step 4: Water Lightly Until Roots Develop:
For the first 2–3 weeks, keep the soil only slightly moist. Lightly mist the soil or add a small amount of water around the base of the cutting 1–3 times per week, allowing the top layer of soil to dry between waterings. Avoid soaking the pot, as excessive moisture can cause the stem to rot before roots have formed.
Step 5: Switch to Normal Succulent Care:
After about 3–6 weeks, gently tug on the cutting. If you feel resistance, roots have likely developed. Once the cutting is well rooted and begins producing new leaves, transition to the normal soak-and-dry watering method. Water thoroughly only after the soil has dried out completely. Continue providing 4–6 hours of bright light each day to encourage compact, healthy growth.

Method 03: Cut the leaves to propagate panda plants
Step-by-step guide:
Step 1: Cut a Healthy Leaf into Sections:
Choose a mature, healthy leaf from a vigorous Panda Plant. Using a clean, sharp blade or sterilized scissors, cut the leaf crosswise into 2 or 3 equal sections.
Step 2: Lay the Leaf Sections on Well-Draining Soil:
Prepare a shallow tray or pot filled with a gritty succulent mix. Place each leaf section flat on the soil surface with the cut edges exposed to the air. Do not bury the cuttings, as excess moisture around the wounds can lead to rot.

Step 3: Keep the Soil Slightly Moist:
Once the cut ends have callused, lightly mist the soil around the leaf sections whenever the top layer becomes dry. Avoid spraying the cuttings directly or soaking the soil. The goal is to keep the growing environment lightly moist—not wet—for the first month.
Step 4: Wait for New Plantlets to Develop:
Over the next 4–8 weeks, tiny roots and baby Panda Plants may begin to emerge from the cut edges of the leaf sections.
Step 5: Repot the New Plants:
Once each baby Panda Plant has formed healthy roots and several leaves, carefully transplant it—along with the attached leaf section—into its own small pot filled with well-draining succulent soil. After repotting, transition to the normal soak-and-dry watering method, allowing the soil to dry completely between waterings.
Dividing a leaf into cuts is an interesting method of propagation. Although it requires more time than stem-cuttings, this method is an excellent way to harvest a bunch of panda plants at a low cost. Moreover, it is more intriguing than other succulent propagation methods. Try it out and see the magic unfold!
Conclusion
People love to propagate panda succulents for several reasons besides their magical reproduction ability. One is their unique and eye-catching appearance. Panda succulents are also low-maintenance and easy to care for, making them ideal for busy individuals or those without a green thumb. Their small size makes them perfect for indoor gardening or small outdoor spaces. Additionally, propagating panda succulents is relatively easy, making it an excellent choice for beginners. The resulting harvest can also create beautiful arrangements or be shared with friends and family.
Panda plants are a fantastic addition to any plant enthusiast's collection. With many species to choose from, each boasting unique and distinctive characteristics, you will surely find the perfect one for you. Proper care allows these beautiful plants to grow well indoors, even without sufficient sunlight.
Look at this list of the TOP 10 panda plants to find your new favorite. 10 Common Varieties of Panda Plants.
You may wonder: How to care for Panda Plants?












3 thoughts on “A Complete Guide to Propagate Kalanchoe Tomentosa Panda Plants”
Bardiaux
Bonjour,
Des petits filaments ont poussé à la base de ses tiges.
Serait-ce des racines ??
Merci de votre réponse !!
Marie-Laetitia BARDIAUX
Bonjour,
Ma plante panda a , à la base de ses tiges, des petits filaments qui ont poussé.
Serait ce des racines?
M. Wooddell
Love your succulents and really appreciate the growing instructions.